What's all this about Histograms?
The histogram is built into most cameras these days, and it is in invaluable tool for getting the correct exposure on a scene.
The histogram basically shows a display of the colours that are within a scene. It's just like the histograms the stereotyped business person shows his stereotyped bosses.
All Digital-SLRs have a mode which allows you to view the histogram of a photo which you have taken, and some SLR-style cameras have live histogram modes that show the histogram of the scene the camera is pointing at.
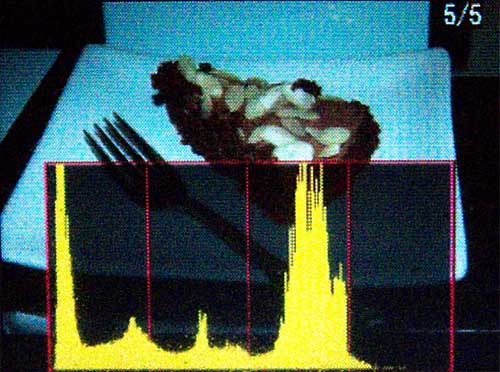
Here's the histogram view on my Nikon D70:
Ok, So what does it mean?
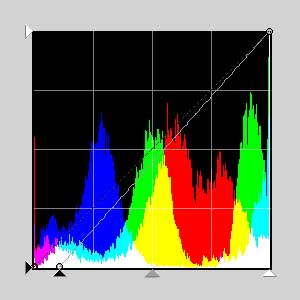
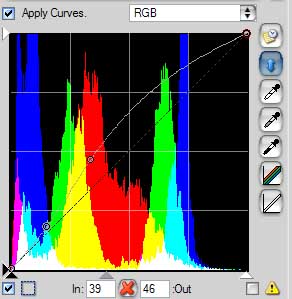
The histogram is a simple representation of the colours that are within the image. Here is the histogram tool from the Bibble RAW converter that I use:
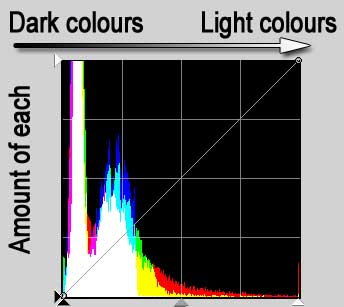
The histogram shows the colours along the bottom and the amount of each colour as a column upwards - the taller the column the more of that colour there is in the picture.
What does this histogram say about the picture it represents?
The histogram above shows that there is a lot of dark in the image, because there is a large block on the left-hand side of the histogram. The right-hand end of the histogram shows that there is some bright red and yellow in the image.
What sort of image does that sound like?
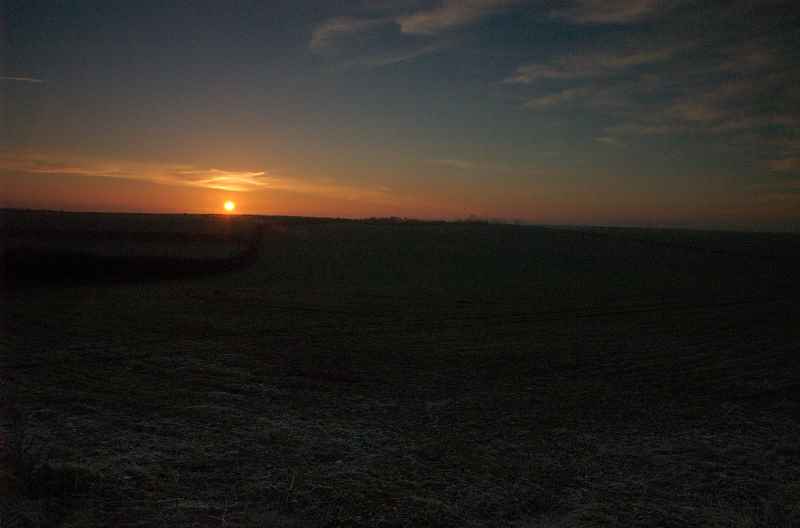
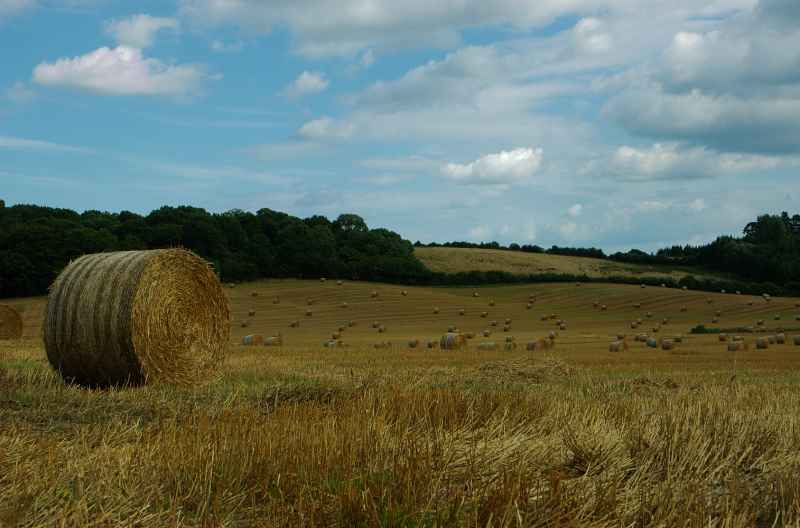
This is the image that the histogram above represents. You can see there is large amounts of darkness, where it is underexposed. This is clear from the image - so why do we need the histogram?
Well, as well as giving you a good indication of the makeup of the image, it can show you things that aren't so clear from a glance at the resulting image. In particular, it can show you if any parts of the image are overexposed which can ruin a perfectly good shot.
How do I interpret it?

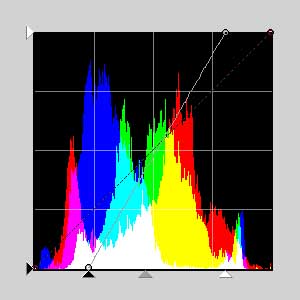
The histogram above represents the image above and you can see that it is a well-rounded histogram, covering the whole spectrum, but not skewed one way or the other (too much). This colour histogram shows how the blue is generally darker in the image than the yellows and reds, which is something most camera histograms don't show.
How about this scene? Does it look incorrectly exposed?
In fact, it looks ok, but the sky is actually over-exposed (sometimes referred to as 'blown') and we have lost quite alot of detail there. This is a common problem when cameras meter on, and expose for, the foreground which is often darker than a sunny sky. Here's the histogram of that image:
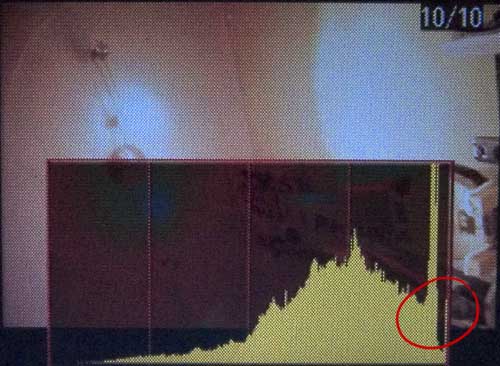
The tell tale sign of over-exposure is the tall column at the very right-hand edge of the histogram. These are all pixels that are at their maximum level. If you see something like this in your histogram on your camera you should consider taking the photo again with a reduced exposure:
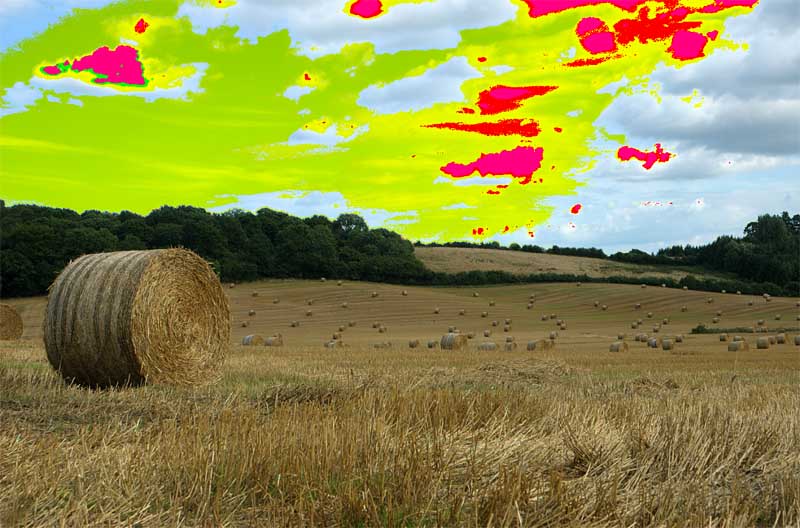
Bibble allows you to see these over-exposed areas with the click of a button:
Most cameras have a mode that will make over-exposed areas flash, or make them go stripey like a zebra. It allows you to see the over-exposed areas more clearly rather than studying the histogram.
If you use JPG files on your camera, then there's nothing you can do about this over-exposure. Nothing at all. However, if you use RAW, or TIF, programs like Bibble can help to overcome this by pulling back some detail from the extra bits of data that the camera stores.
How do I fix the exposure?
The best way is to check your histogram after taking the photo and if it's no good, take the photo again! However, that's not always possible if the photo opportunity has moved on.
The only way to regain detail in the over-exposed parts is to use a RAW processing tool that understands the extra data that the camera has stored. They usually have an exposure processing tool and some have special tools for regaining detail in blown areas.
Although Photoshop has a RAW processor built in, it's somewhat basic and slow, so here are some other popular RAW workflow tools:
The image below has been post-processed (using curves and levels and Bibble's Highlight Recovery tool) to bring back some detail in the sky. Look in particular at the cloud in the centre that now has a well defined shape and texture, which the original over-exposed image does not.
You may feel this photo is now under-exposed, but under-exposure is much easier to fix than over-exposure (as it doesn't lose detail so quickly). Using Photoshop you might perform a selection on the ground (leaving the sky untouched) and adding a curves adjustment layer to brighten it a little.