Macro on a Budget - Reversed Lenses
I've been asked a few times about how I take macro photos using a reversed lens, and what equipment I need to do it. So I thought I'd explain what I do and what I use on this webpage.
- Reversed Lens? What?
- What's Needed: A Lens
- What's Needed: Which Lens?
- What's Needed: Extension Tubes
- What's Needed: Light
- Cost
Reversed Lens? What?
One of the many techniques used to produce macro shots, is to put a normal lens onto your camera back to front.
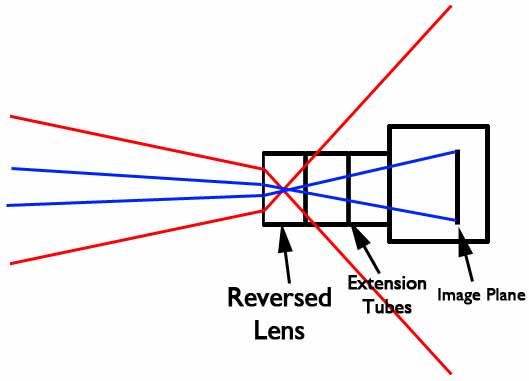
The reason this works is that a lens normally focusses the light from the scene onto a the film, or sensor in your digital camera; you could think of this has taking a view of something really big and making it really small. If you reverse the lens, your lens now takes something really small and projects it into a big image in your camera. The thing is, the film or sensor in your digital camera hasn't changed size, so it gets only a very small portion of this big image - which effectively magnifies the image.

In the diagram above the small portion of the image that ends up on your sensor is pictured in blue, while the image the lens is capable of showing is displayed in red. In the reversed lens diagram the red-lines are reversed.
A Lens
The first thing you need is a lens to reverse. Because the lens is placed on your camera back-to-front, it does not matter which mounting it has. This means you are able to get cheap lenses with unusual mounts from Ebay for this purpose. Alternatively, if you happen to have an old lens from an old system hanging about, it will probably do.
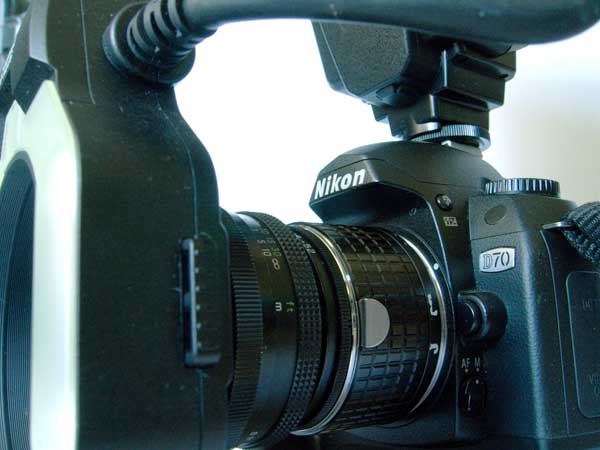
I use a 50mm prime lens, made my Carl Zeiss, that I used to use with my old Practika. It has a M42 thread, but this doesn't matter and it works just fine on my Nikon D70.
Which Lens?
For reversing you want a prime lens. Although you can use zoom lenses, it is very difficult to control the focus point when zooming in and out, and a prime lens will give you the best image quality.
The focal length of lens required is a compromise between working distance from the subject and magnification. A 50mm prime is ideal, because it provides you with enough working distance from the subject to be practical, while also providing a good magnification. Longer focal length lenses will not magnify much, whereas short-focal length lenses will require a very small subject-to-lens distance.

Reversing Ring
Secondly you need a way of mounting this lens back-to-front on your camera; you need a reversing ring. These rings have thread on one side that will screw into the filter thread of your lens. On the other side they have the camera mount specific to your system (Nikon F mount, or Canon EOS mount).
Again, you can find these reversing rings on Ebay (search) or somewhere like Kood International or The Widescreen Centre.
You may also require stepping rings to be able to attach the reversing ring to the filter thread on your lens. My lens has a 49mm filter thread, but my reversing ring is 52mm, so I have a 49mm-52mm stepping ring in place.

Extension Tubes or Bellows
Reversing a lens on your camera will provide you with a reasonable amount of magnification. However, if you want to get in closer, you will need to move the lens further from the image plane. To do this, you use extension tubes, or bellows.
Both of these items can be bought from Ebay (search for extension tubes, search for bellows) for a good price (particularly with regard to the extension tubes).

You can see in the diagram above, that extension tubes work by making the projection from the lens larger - therefore the film or sensor (which hasn't changed size) gets less of a proportion of the projected image (and light) than without the tubes.

Light
The problem with the reverse lens technique, and even more so with extension tubes, is that they rely on using a small area of the available lens projection to provide the magnification. This means that the image plane receives a great deal less light than otherwise. It is even more of a hinderance when you consider the depth of field (which is dependant on magnification, and therefore a problem with macro lenses too) is incredibly small and to maximise this you need to stop right down. Light, therefore, is a major issue.
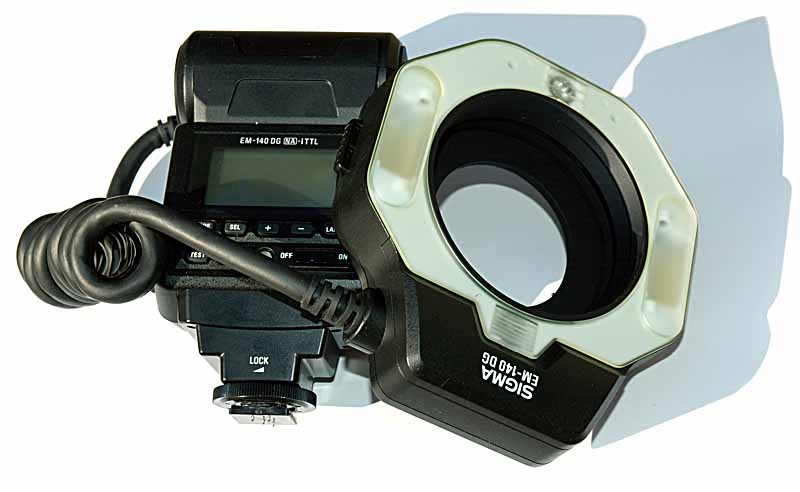
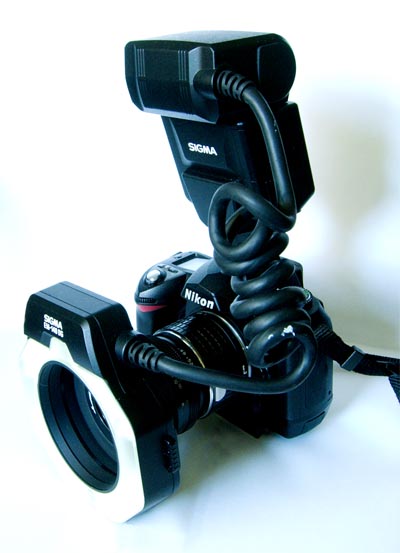
The main way of providing light to a subject is by using a macro, or ring, flash. These are circular flashes that fit over the end of a lens. They generally have a filter-thread on them for screwing into the end of the lens. However, when using the reversed lens technique, there isn't a filter thread into which to connect the flash. I have used blue-tack to hold the flash to the inside of the reversed lens, however, other methods could be used. For example, using another reversing ring would do the job.
An alternate method is to use normal flash guns positioned either side of the camera. Manfrotto (Bogen) have a special mount for exactly this purpose (see here). If you went this way, you would need 2 controllable flash-guns and a hot-shoe to multi-pc-sync adapter, that you can also get on Ebay (search). This photo was taken using a single flash-gun. Canon have gone one step further and developed a flash specifically for macro but designed on this paradigm (see here), but its somewhat expensive (over £500).

Cost
The major cost in getting into macro in this way, will be the ring flash/flash mount. Prime lenses can be picked up on Ebay very cheaply, as can the extension tubes. Although not so prevelant on Ebay, the reversing rings can be picked up there, but the shop links provided above also sell the items.
The cost of my setup was:
| Item | Price |
|---|---|
| Lens | £0.00 |
| Reversing Ring | £11.00 |
| Extension Tubes | £11.00 |
| Sigma EM140-DG Flash | £180.00 |
| Total | £202.00 |
Note that over 80% of the cost of my setup was my flash. Previously to getting the Sigma flash, I used a Vivitar 6000AF (which I can recommend, despite mine expiring), and that cost me only £60, which would make the total cost only £82.

