Smoke Photography?
I don't profess to be an expert at smoke photography. I first came across it at Sensitive Light and was captivated by the amazing patterns. Could that really be smoke? I have only done smoke photography twice, but here is how I do it; it may be of use to someone else starting out.
How is it done?
The Smoke
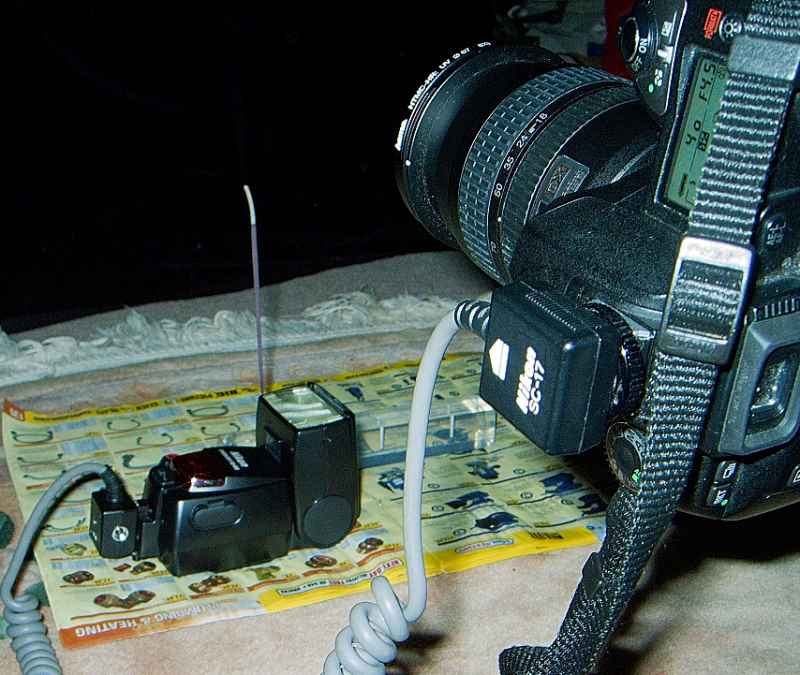
Firstly, the smoke comes from an incense stick. These are thin pieces of nice-smelling stuff that you burn to make your house smell nice. They're really cheap and can be bought in most craft-goods shops. The idea is you start one burning and take photos of its smoke. You can buy incense stick holders that hold the stick as it burns. Some will catch the ashes and some won't, so I put mine on a scrap piece of paper to make it easier to clean up.
The camera
The camera is mounted on a tripod. This is absolutely necessary as the focussing is relatively critical. As I do this on the floor, the tripod needs to be able to be positioned low to the floor.
The Flash
I put the flash directly beneath the incense stick. I use a Nikon SB-800. I haven't found a better place for it, yet. Being here, ensures the smoke lights up, but reduces the light landing on the backdrop. You may need to shield the camera from flare from the flash. The flash needs to be connected to your camera, by a lead; I use a Nikon SC-17.
The flash needs to be set on manual mode and set to its shortest possible flash duration. This is the equivalent of setting it to its least power output. Doing this ensures that the smoke will be frozen on the picture.
The Backdrop
For the backdrop I use a black velvet sheet I bought from a fabric shop (£6.99 a metre). It is important that the backdrop is not close to the incense stick to avoid it catching too much flash light. This makes the background as black as possible. You may need to sheild the backdrop from the flash too (effectively ending up with barn doors on your flash if you're shielding the camera too).
Logistics
For working you need a small lamp to be able to see what you're doing, but it needs to be dark enough that the scene isn't exposed by the ambient light. I use a small lamp placed at the back of the room. When taking photos, I lie next to the camera watching the smoke. It's important to do this in a calm location, because any small breeze and you will not get nice smoke patterns. Sitting close allows you to see the smoke as well as alter it with a directed breath here or there.
Post Processing
Initial Processing
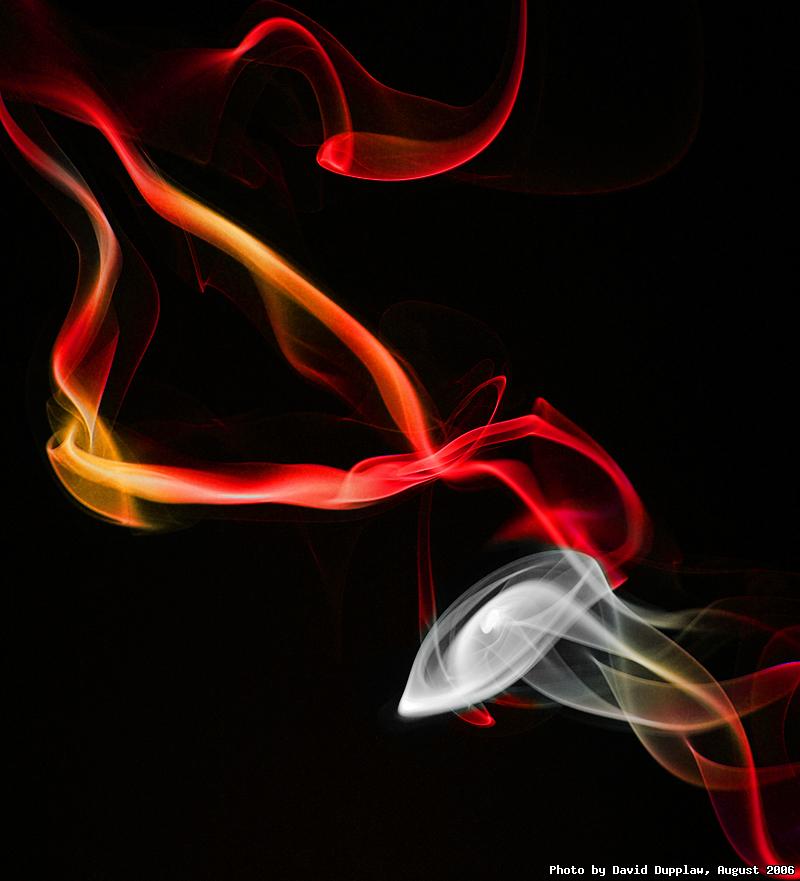
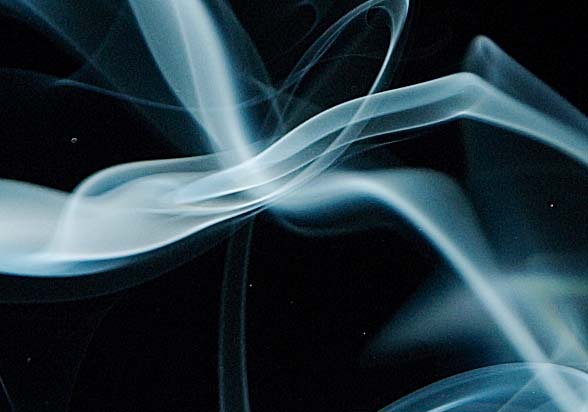
So, you've taken 150 shots, and you're browsing through them on the computer. Hopefully one or two will be in focus and have nice patterns in them. I've chosen one to work on that has a nice 'eye' shape in it.
Here's the original file:
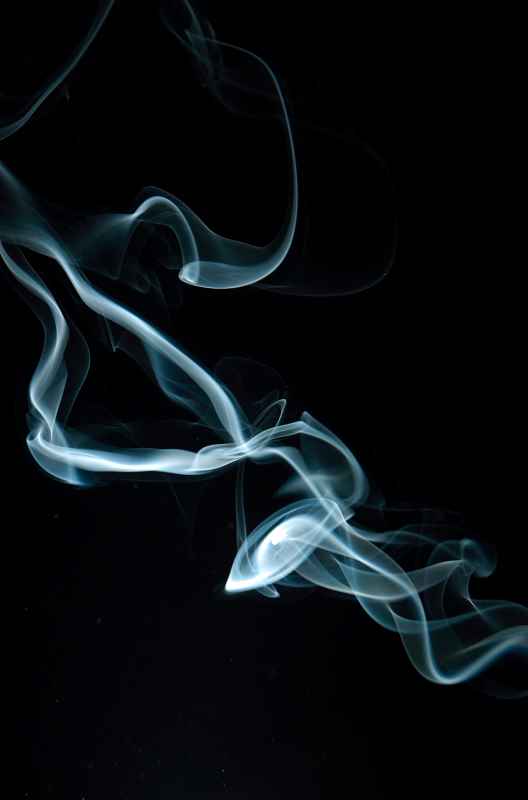
The first thing you might notice is that the smoke is a grey/blue colour and the background is black. This is how all smoke photos will come out (if you have un-coloured smoke, I guess).
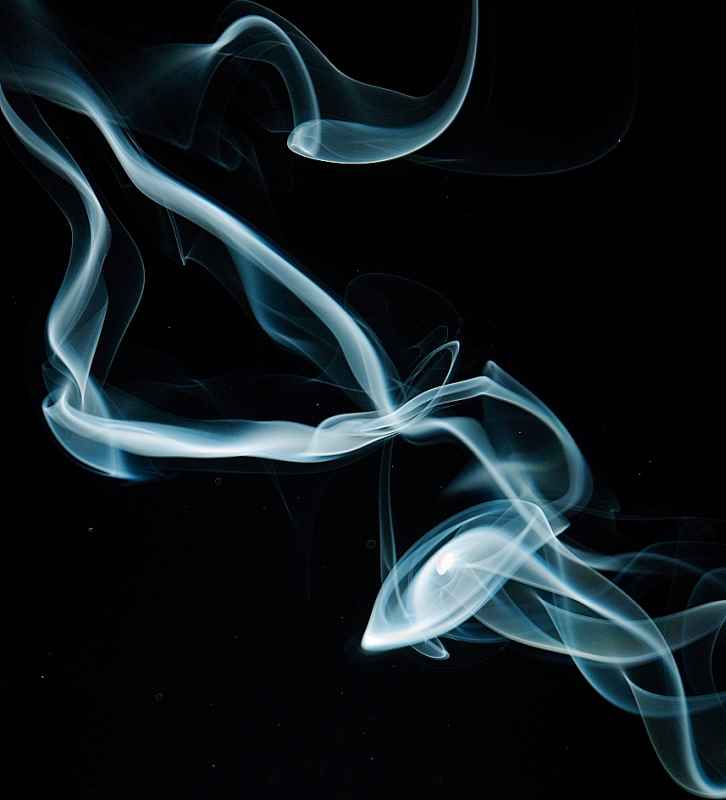
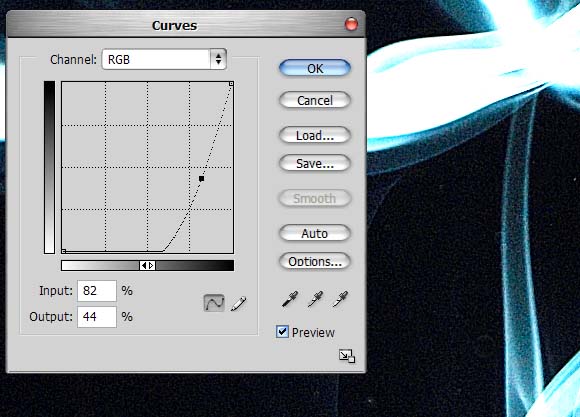
I will crop the image, to make it look a bit nicer, cropping some of the unnecessary black, and placing the 'eye' near the lower-right third. I do my initial RAW processing in Bibble.
I also apply a bit of sharpening and a typical reverse-S curve to add some contrast (help the background to be black).
Here's the cropped and curved image:
Dusty Bits
Next I swap the image to Photoshop for more touchy-feely processing. When it gets there (as a 16-bit TIF) you will notice that the image has lots of dots all over it. Observe this 100% crop:
The dots are not dust on the sensor, but dust in the air. Smoke is actually lots of very small particles of dust and some of these appear larger than others, either because they are larger or simply because they're nearer to the camera. These dots show up on the photo.
We use Photoshop's clone-stamp tool to remove the dots. It's painstaking but very important.
When I've got rid of all the major ones, I will apply a very heavy brightening adjustment layer to the image to show up dots that are not visible on my monitor. This is important if you intend to publish the photo, particularly on the web, as some peoples' monitors will be badly calibrated and will show up these dots that are all but invisible on mine.
Once I've removed all the dim-dots, I remove that adjustment layer and the image goes back to how it was, but much cleaner!
Colouration
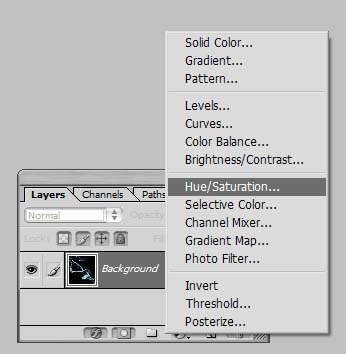
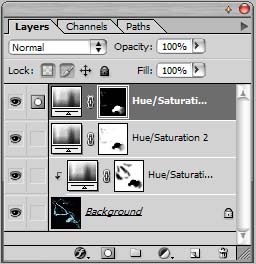
To make the image more interesting, I want to colour it. To do this we use adjustment layers. If we add a Hue/Saturation adjustment layer, we can colour the smoke (now it all seems very lucky that it was slightly blue in colour in the first place).
To apply an adjustment layer click on the little black/white circle in the layers palette and select your adjustment from the menu:
Here we apply a strong red hue:

This applies it to the whole image, but that's not all that interesting in this case. I want to really highlight that eye shape. So, I apply a mask to that adjustment layer. I do this by selecting the mask (next to the layer thumbnail in the layers palette) and using the paint-brush tool set to a large, soft-edged brush in black.
I end up with a mask like this:
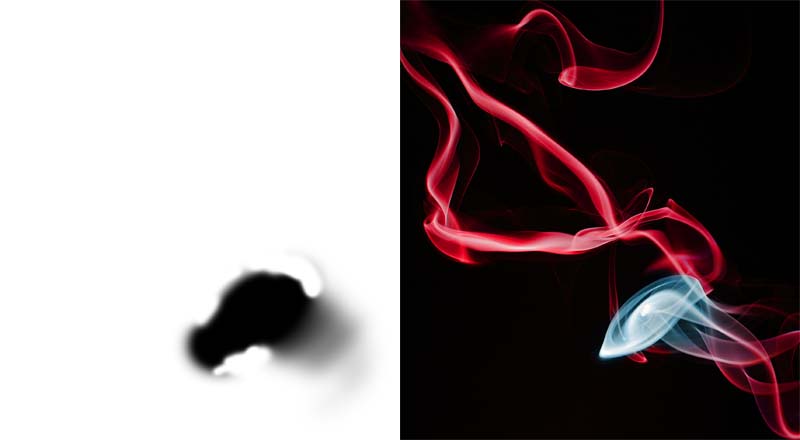
I can now go ahead, and do this a number of times, adding different colours to different parts of the image:
Final Image
This is what we've ended up with: (also posted here)